
Well, 2020 brought us a handful of good things.
One of them was a bathroom that we added from extra space in our garage.
Some of you may recall that our home is currently split; with a main home and ADU connected by a deck in the middle. There is living space on the other side (where our garage is located ) and we needed to have another bathroom for our family of 6.
The plan, hopefully in the next year, is to to connect the ADU to the main house and we’re currently working with an architect on those plans, meeting with the city about code restrictions (we’re surrounded by wetland), etc. Y’all can be praying for me. It’s been a ride to say the least.
Anyhow, the bathroom was an “easy” decision and when thinking of ways to make our space more efficient. Our teens needed this space as well so it was somewhat of a no-brainer for us to consider not to mention the overall increased value of the property if and when we decide to place it on the market.
Today, I’m going to begin at the end and show you how it all turned out and work my way backwards which may seem a little counterintuitive but I think splitting this up into parts is best as-with almost any home renovation project-the timeline stretched out quite a bit. (surprise!)
I’ll be back at the end of this week with all the behind the scenes and a full source list for you as well as some budget friendly tips to help you with your next renovation project.

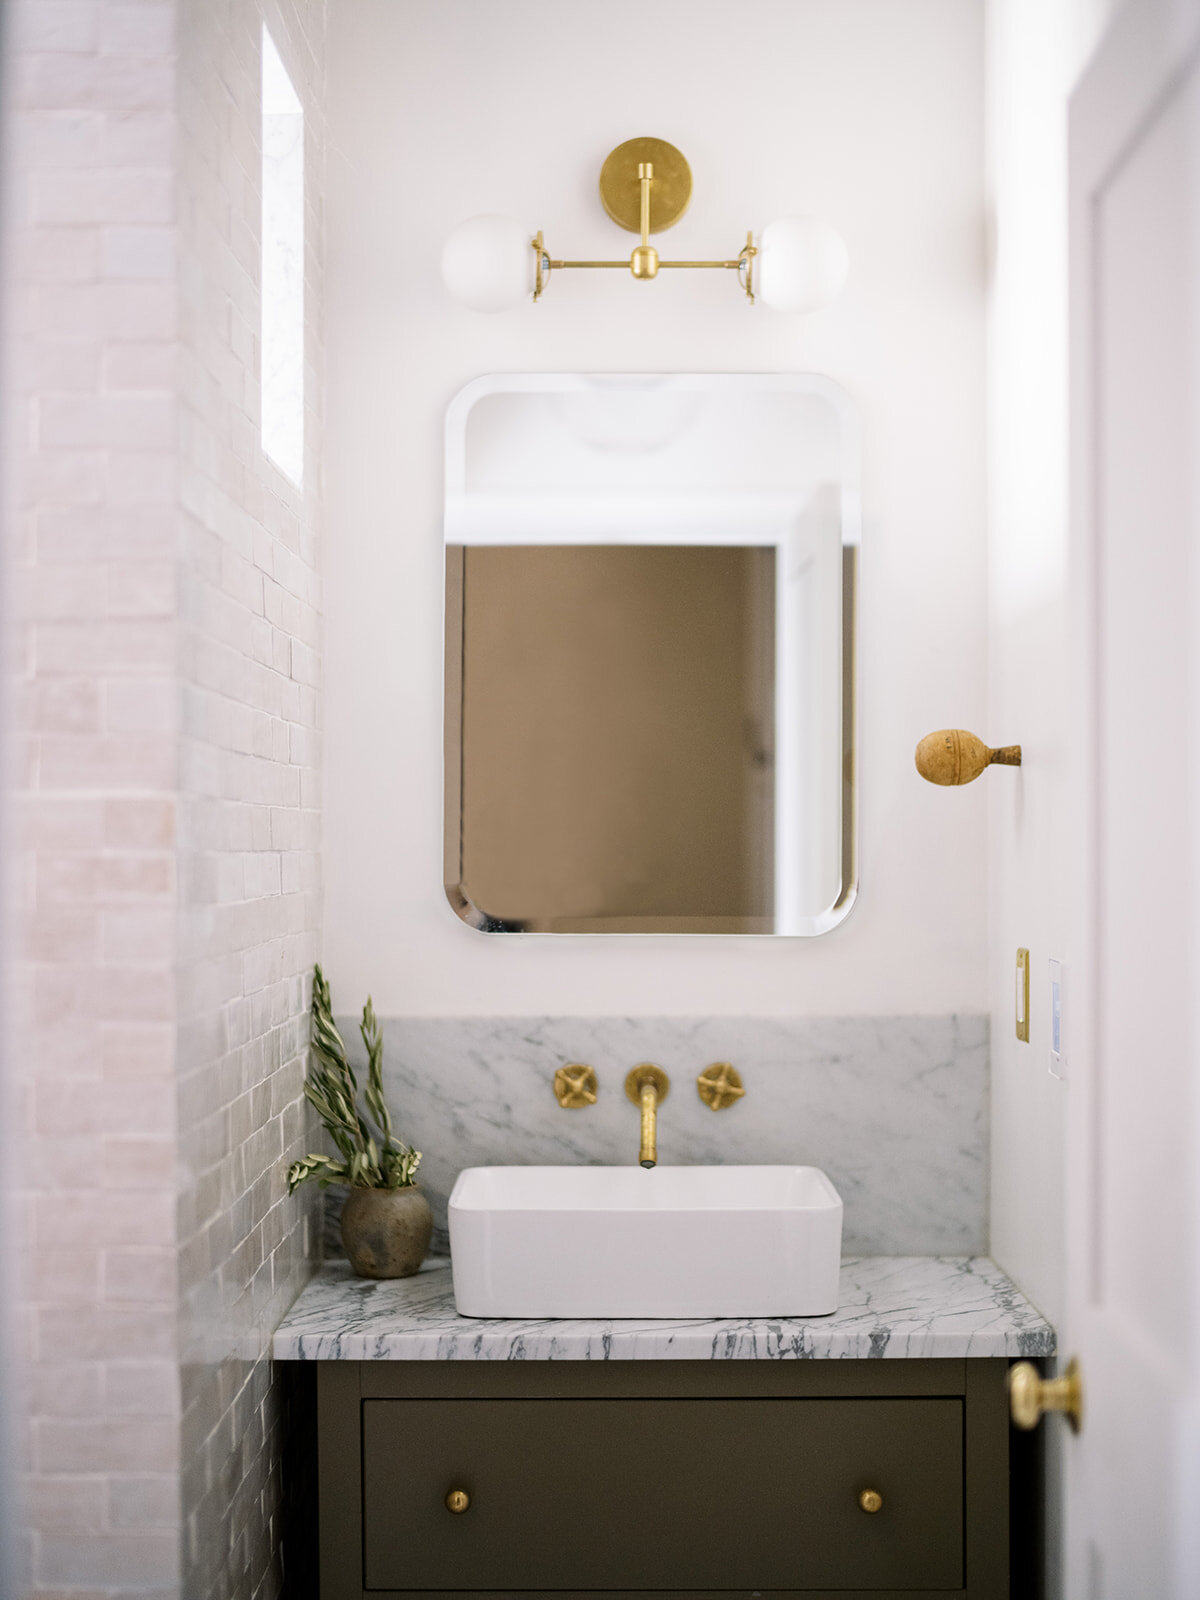
PHOTOGRAPHY | Anna Peters
We began this project at the very beginning of January 2020 and, as you know, that was when the pandemic began to shift the way we all lived.
I was able to partner with Riad Tile and Clare paint to help pull this all together and I’m so grateful for their support in helping us complete this project.
So, without further ado, I present to you…the (almost) finished bathroom. *record screeches*
Oh, I forgot to tell you? Well, the bathroom isn’t COMPLETELY finished. We still have to wrap the steel I-beam and trim the sides of the sink cabinet.

PHOTOGRAPHY | Anna Peters
I knew that I wanted Zellige tile in the space and that I wanted it to run its course throughout any future projects that we work on in the home. We hired this tile job out as zellige is somewhat of a booger to work with and the best option was calling in someone who had the expertise and skill to set these properly and give them their due shine.

I absolutely love the results. The texture and the color variation makes for some really fun visual interest and keeps the eye moving which is really important in such a tiny space. Every tile is different and I’m not one bit mad about that.

I also knew I wanted brass accents.
The idea in this space conceptually was to mix a bit of old world, classic with modern touches and I think we accomplished that.


I’m so excited to share with you all how we didn’t cut corners and managed to save a lot of money to get the look we wanted (even after the tile partnership).

This bathroom was VERY dark and still is pretty dim throughout the day. The window faces our back yard which is pretty wide open but filled with trees and this side of the house remains pretty shaded so to combat that, instead of a half wall (which posed structural problems) we opted for a cutout to allow light to flow into the other side of the bathroom since there is a shower wall splitting the two sides.
There are still a few things that remain on our to-do list for this space. One of which is closing in the sides of the cabinet (a score BTW, I’ll be sharing more of that on Friday) with trim, wrapping the beam above head and adding the custom curtain rod. I wanted a traditional rod to help the space feel a little more warm and cozy and open and honestly the glass is just not fun to keep clean. Since our teens would have full use of the space, I KNEW that glass just wasn’t a great option here. The linen curtain works perfectly but of course,there’s a little secret behind the source for that, too.

So, there you have it.
The (almost) full reveal of our bathroom addition.
I’ll be on Instagram throughout the rest of this week taking questions and responding to them here on Friday so be sure to join me there to ask all the questions you have about this build and the process/sources.
Love love love to you all and have an amazing rest of your week!
XO,
Kennesha