decor

My Favorite Coffee + Side Tables for Small Spaces

“Houston, we have a problem. We have no space for all this furniture we want to fit into our small home.”

Well, no worries my friend. Hopefully that will be less of a problem after surfing through some of my favorite designs in side and coffee tables for small spaces.

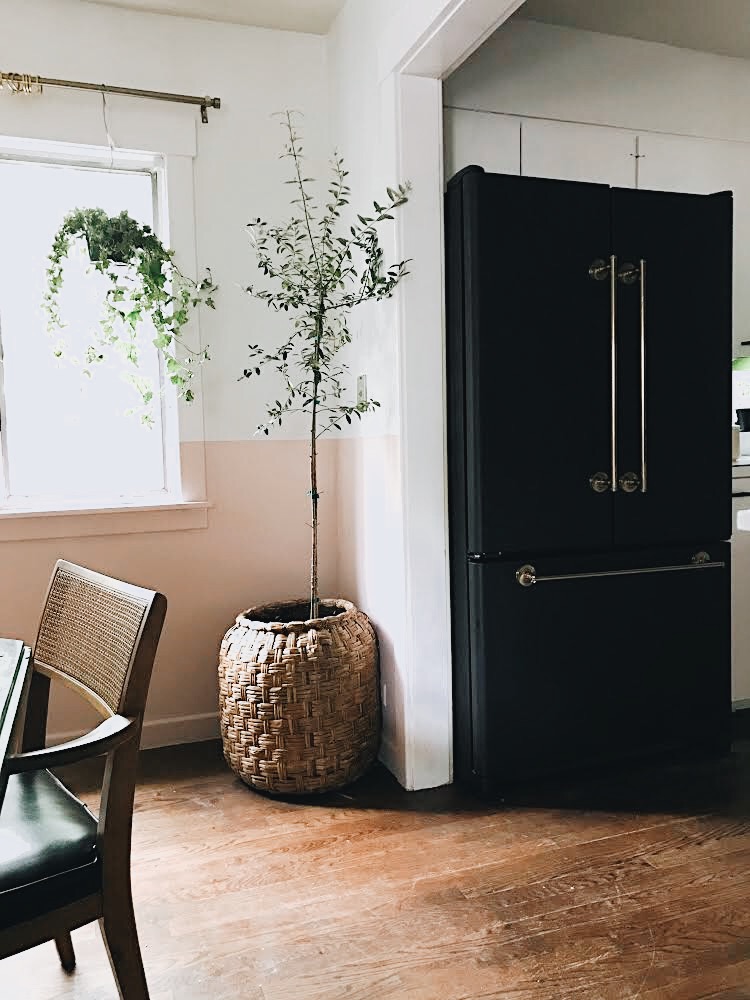
A s point of reference for where I even have the least bit of authority to speak on this topic: we live in a…well…a weird home.

This is what I mean: If you look at the square footage (2750 sq ft) you’d think we’d have plenty of space. (And honestly we really do—the layout is just super funky) After all we have 5 bedrooms and 2 bathrooms. The problem with that is that a large percentage of that square footage is walk-in closets in four of the five bedrooms that could literally qualify as bedrooms themselves if they had windows.

This leaves little room in the area that we use the most—the combined living and dining space on the lower level of the home.

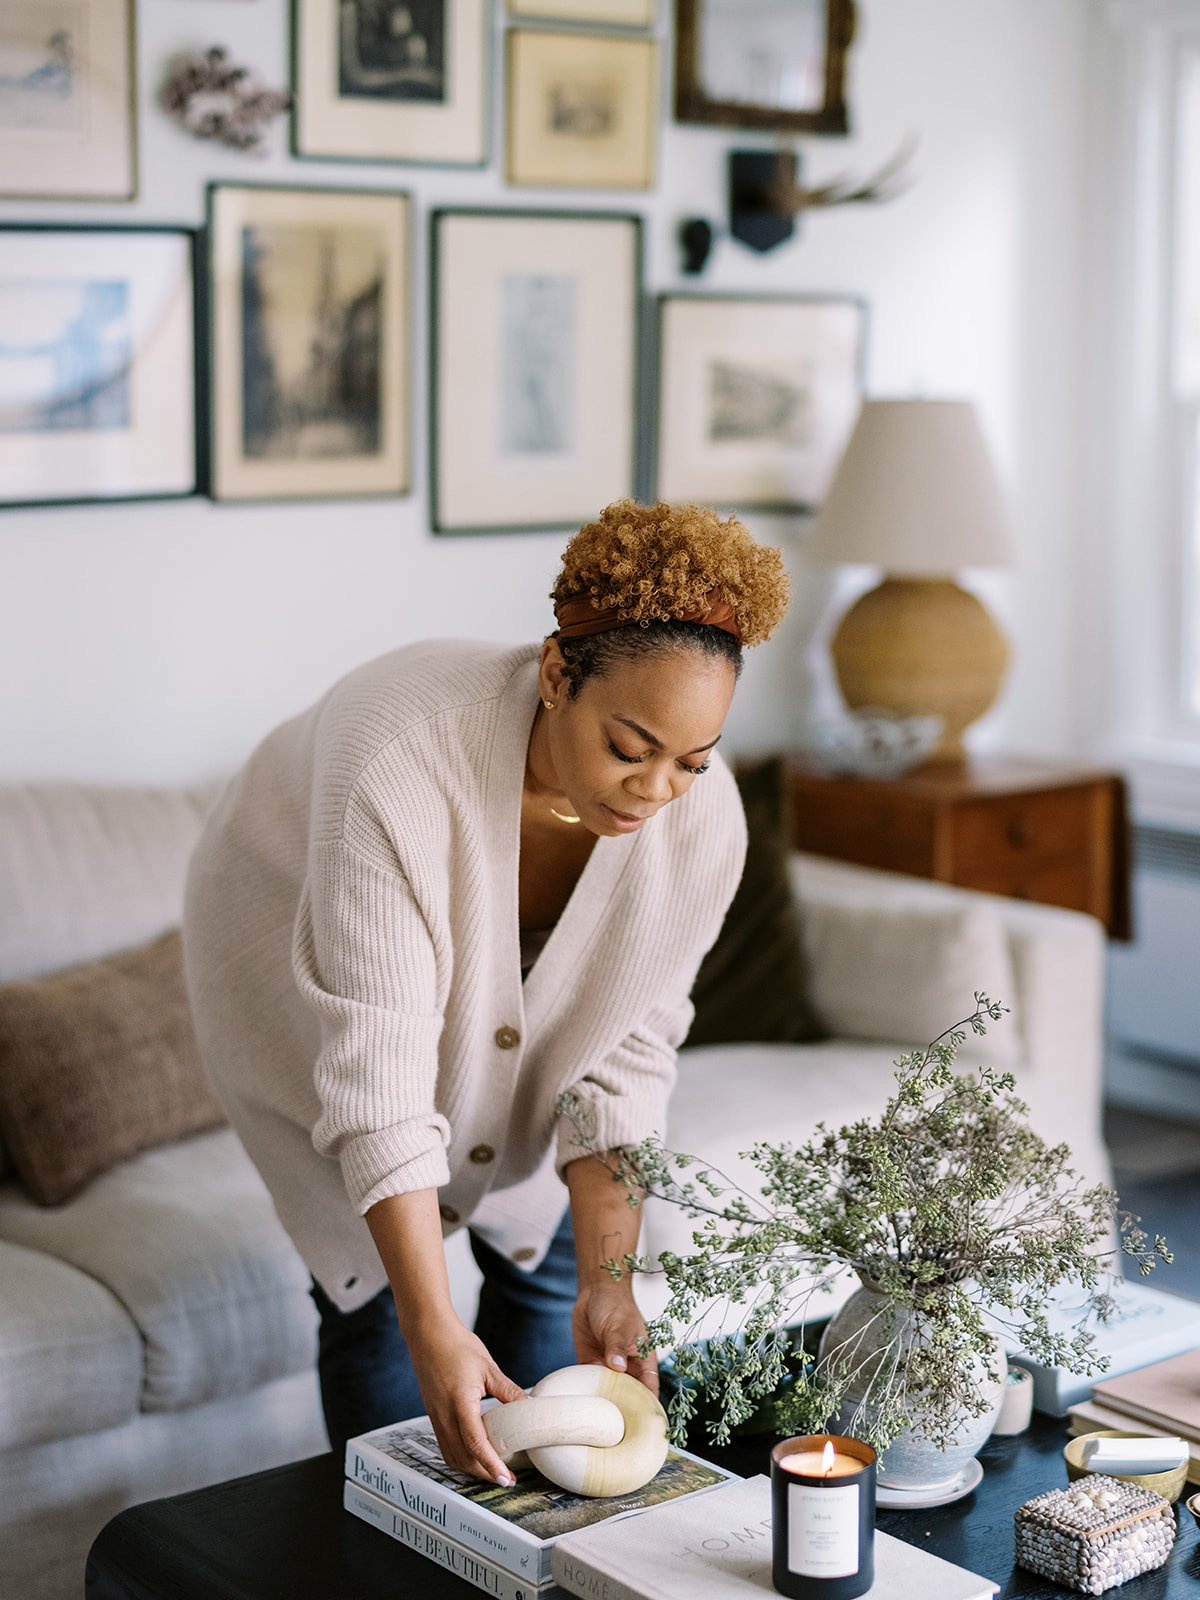
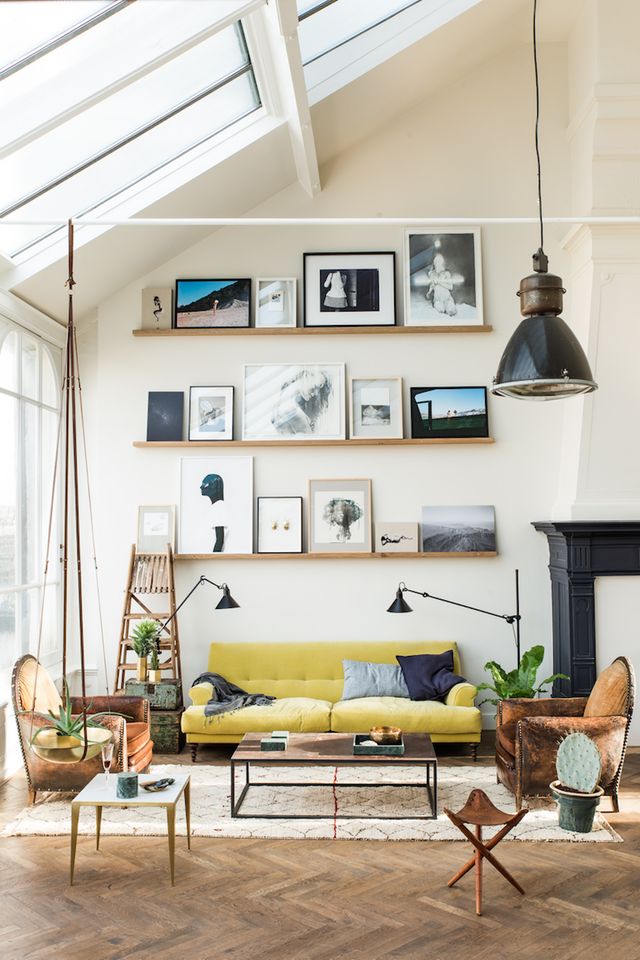
I think we’ve gone through a billion arrangements in trying to figure out how to make a small space feel large and I’ve settled for now on using our ottoman as a coffee table which isn’t a bad deal if you ask me but I’ve had some requests recently on Instagram for suggestions on small space living and I thought since I’m actually living that life, it’d be fun to offer some products and items that have helped me make that lifestyle a bit easier along the way.

sideandcoffee.png
Square Deal Collage 3 (2).png

round marble + gold table | 125 bay isle coffee table | 336 black nesting | 33

rivet side table | 126 dubois coffee table | 600 wood + gold round coffee | 129

turned wood coffee table | 699 small wooden round side table | 50

xeros woven coffee table | 300

I love that the above options offer something for just about everyone whether your style is more casual and relaxed or a bit more traditional and classic. There’s something out there for everyone.

Where are some of your favorite places to shop for furniture for smaller spaces? Let me know in the comments below.

until next time,

xo Kennesha

DIY | A SURPRISING FRIDGE TRANSFORMATION by Katie Saro

A HUGE thanks to Katie Sarokhanian, for sharing her expertise with us today on the blog. Katie is an artist and interior design lover who lives by the mantra: “your home is your creative canvas”. She is a mom of 5 and has an amazing attention to detail as made apparent below. I am so excited to have her join us over here at Restoration House for a little DIY that just about anyone could tackle in their own home.


I’ve been frustrated with the lack of options for fridges these days. Stainless steel has been reigning at the top of the refrigerator world, and I see why, but I wanted something different. Wish List: 1. High-end look 2. Unique 3.Fits my space 4. Coordinates with the brass and gold in my kitchen 5. Works well and 6. Inexpensive. Sound super attainable, right? 

I found a new matte black refrigerator online that I fell in love with, but it came with a $3k price tag. Since we’re not ready for a total kitchen renovation, I decided to make my own matte black beauty.

One of the most important steps is to find a good stainless steel fridge to “ruin”, of course! I found this one on Craigslist for $200. It was fairly new, the right size, a great brand, and worked perfectly, but had one big scratch on the front and thus the low price. Great candidate for a painted-fridge experiment!

 Here’s the breakdown of how I updated this refrigerator, which included, sanding, priming, painting, and replacing the old handles with new matte brass handles.

45D932E2-1E9B-4491-A9D6-2471A86680FB.JPG


1. REMOVE THE OLD HANDLES.

Look on the side of the handle and you’ll see a small hole. Grab an allen wrench to loosen the screws, and the handles will come right off! Shockingly simply. If your fridge has a glued-on logo on the front, I also suggest taking that off for a custom look. I popped mine right off using a flat head screwdriver.

2. MEASURE HOLE-TO-HOLE.

It’s WAY easier to install new handles if they’re the same size as the existing holes. There are a wide range of appliance handles that you can purchase that look great, but they’re also expensive, which defeats the purpose of trying to make an affordable update to a used fridge. So, my solution was a towel bar. No, really! I searched on Amazon for something brass with 24” hole-to-hole measurement and found these for $29:

matte_black_diy_fridge.jpg

(The ones I bought are out of stock but there are many other gorgeous options, like these.) I also looked at grab bars like these, which might be a good option for your fridge depending on your handle measurements.

Or, of course, you can keep your existing handles and just paint those too!

3. PREP THE STAINLESS STEEL.

First, I sanded the metal with a fine sanding block. Next was primer. There are a lot of primers out there made specifically for metal. I usually walk into a Sherwin-Williams store, tell them what I’m doing, and they have great suggestions for the right type of paint and primer to use. That is one option for you and I’m guessing it would work just fine. This time, however, I used something called “self etching primer” instead of the usual metal primer. Self-etching primer is customarily used on automobiles, but I thought I might try it here since at our house, our refrigerator has to withstand loads of abuse and heavy scrubbing. There are a lot of different brands and options online, and you could buy it in a spray can or roll it on. But, make sure to buy a dark-base primer. (I accidentally bought a white tinted primer, which still worked fine but I had to do about 5 top coats of black paint.)

4. PAINT THE FRIDGE BLACK.

I bought Sherwin-Williams “Emerald” latex paint in a matte finish in Tricorn Black. It looks great! I did about 5 coats on the front using a small foam roller. On the sides of the fridge, which were not stainless steel, I didn’t sand or prime at all. I simply put on two coats of this same paint, which is a paint/primer combo. Mostly that’s because the sides are rarely touched or scrubbed and thus didn’t need to be as durable.

84F88F8C-938B-4380-B9E1-FAE82A761578.JPG

5. INSTALL NEW HANDLES.

To install my new handles, all I did was follow the mounting instructions that came with the “handle” (towel bar) and screwed right into the exiting anchored hole on the refrigerator door. It was simple and they are now sturdily attached! However, the bottom handle of the fridge was a bit more difficult. After a few days, the handle started to get loose. Why? Because to open the bottom freezer drawer, you have to pull OUT and UP at the same time, which strained the mounting hardware that was designed for a towel bar, not a freezer drawer. My solution was this product called JB Weld. The salesman at Lowes said he once used it to attach a trailer to a broken hitch, so I figured it was strong enough for a handle. I put a dab of the putty between the mounting hardware and the handle and clamped it for an hour or so. So far it has worked great! If you couldn’t find handles that fit your existing screw holes, you could possibly use this same product to attach your new handles. I would still screw right into the refrigerator door, then reinforce the mount with the JB Weld putty.


013FCAA9-8B1B-4437-8F11-A2DF02181FCA.JPG


After attaching the handles, I was done! It took just 3 days to complete due to drying and re-coat times, (and due to the fact that I was slowly moving, 9-months-pregnant lady trying to crawl around and paint a fridge in the middle of the night).

I now have a custom, high-end looking refrigerator instead of the giant, stainless steel BEAST that took up all the visual space in my kitchen, and I couldn’t be more thrilled! Honestly, I prefer the look of this DIY refrigerator to any new models I could buy—at least any new models I could buy that are less than about 8k dollars, if you know what I mean.

 So, if you have the same stainless-steel-hating problem, if you are aching for something creative for your kitchen, and if you’re not afraid of a little paint—give it a try! Someone once told me that you can’t ruin what you already hate, and that gave me the push to not only paint my refrigerator black, but to paint my cabinets pink. Gasp! That was such wise advice. Now I’m passing it along. Get creative my friends, because your home isn’t just your home, it’s your canvas too.

SOME HELPFUL FAQ’S |

Here are a few questions I got from my Instagram readers that you may also have:

 How do you paint your handles if you want to keep your same handles?

I would suggest a light sand, and using the spray can version of the self-etching primer (assuming your handles are also stainless steel).

Can you paint a fridge that’s not stainless steel?

Sure, why not? I wanted to do it on a stainless steel surface because it would have a much smoother look than the alternative, textured refrigerator surfaces.

How is the paint holding up?

Great so far! It’s been about 6 weeks. I considered putting a matte poly over the topcoat, but since I had a baby the day after I finished this project, I never got around to it. I can guess that it might add an extra layer of protection, and I still might do that someday.

What about that scratch on the refrigerator?

(The original finish had a few minor scratches)

It’s almost completely unnoticeable after painting! So, if you want to give this a try but are afraid to do it on an expensive stainless fridge. Look for an inexpensive one like mine with scratches. Here is a close-up of the scratch in the bottom left corner. (I didn’t attempt to repair or fill the scratch at all.)

Hot Plate Hot Plate.png

GALLERY WALL INSPO + MY DILEMMA

Photography | Ryan Flynn Photo for Glitter GuideStyling | Restoration House

Photography | Ryan Flynn Photo for Glitter Guide

Styling | Restoration House

We live in a rental. We can't touch anything in the home we live in. No new flooring, no new cabinetry, no new wall colors-nothing. Now, if you're reading this and you're a creative like me who loves changing the aforementioned more than you change your unmentionables then you understand my plight. Couple that with an architectural design that isn't exactly my own and it COULD be a recipe for disaster. 

As they say, 'necessity is the mother of invention' and Lord knows that necessity has "mothered", "fathered", "uncle'd" and "aunt'd" my desire to have the home we want over the years and taught me how to turn obstacle into opportunity over and over again. After all, it's the whole reason Restoration House exists. 

What does all of this have to do with gallery wall, you ask? I am glad you asked. The one thing I can do in this space and others we have lived in is hang things on the wall and one thing I have been obsessed with over the years is gallery walls. Have I actually given into that obsession? No. 

It's complicated, really. Well, maybe not. The truth is...I have been afraid. Yes, it's true. While I can commit to many things in my life I always find it most difficult to commit to many things when it comes to our home. Whether it's the next piece of furniture we will invest in or light fixtures, I just can't seem to commit, guys. 

A few weeks ago, however, something changed. I discovered this newly found freedom to gather some of our photos, thrift and DIY others and begin the journey of continuing to turn this home, regardless of how temporary, into more of the home we want it to be. 

My hope is that you can turn away after reading this post with more confidence to start your own wall of art and give it the personal touch it needs to uniquely represent your life and, more importantly, your home. 

WHAT IS A GALLERY WALL + WHAT TYPES ARE THERE?

A gallery wall is a collection of photos or images displayed on one’s walls to highlight special interests from family members to favorite foods. They run the gamut and can be used creatively to express another dimension of a homeowner’s personality or bring out the character in a specific space in a home or a person’s life.

There are lots of different kinds of gallery walls but I’ve divided them into two main categories and within those two, a few different styles can be expressed as you will see below.

For the sake of space and time here, I’ve decided to talk today about the asymmetrical and symmetrical in relation to the alignment of frames on the wall.

I typically lean more toward a symmetrical and “even” way of displaying not just frames but just about everything in my house. I have a need to feel balance and symmetry in just about every part of my home. It just makes me feel grounded and, overall,  good.

WHO NEEDS A GALLERY WALL ANYHOW?

Well, technically no one does but what it does in a home is pretty darn amazing. Gallery walls allow for you, as a homeowner and your own personal designer, to reflect and express yourself through the walls of your home. It also allows that expression to be temporary vs. more permanent things like paint color and furniture. I liken this, while perhaps a bit more committal, to things like throw pillows, shelf decor and accessories or accent throws. If you don’t like the way it looks or the pics are too old you just take them down or exchange them for something new or that you like better. Easy peasy.

Except, for me, it’s not been very easy peasy at all. This is where the whole “dilemma” part creeps in and where my Type A brain begins to beg me to make a decision and break things down a bit more so that I can actually take action.

So with that in mind, first up, ASYMETRICAL:

BOHO ECLECTIC via Pottery Barn

BOHO ECLECTIC via Pottery Barn

What I love about this style and the ones I will share throughout this post is that no matter what your personal style may be, you can choose to go with either way of displaying your artwork and photography. For this boho themed space, I love how the wall of frames seems to pull everything together to make it feel more cohesive.

VINTAGE MODERN via Emily Henderson

VINTAGE MODERN via Emily Henderson

Raise your hand if this one is just your fave. Even though the frames have been displayed asymmetrically, the consistent imagery in each of the frames once again gives it a cohesive feel. There’s no doubt that Emily knows just what she is doing here but I love that it’s approachable and something that just about anyone could pull off. How does this translate in your home? Do you love paint by number images or paintings or do you love sunset paintings? Use those as a catalyst to created a themed wall similar to this one.

BLACK + WHITE + ECLECTIC

BLACK + WHITE + ECLECTIC

Okay so I love the calm, cool and clean vibes this one gives. I also love the unique and vintage art that this homeowner uses in the space and that one piece is used a focal to draw the eye in, then move around the display. Because of the choice in colors, there’s also no competition. One isn’t fighting for the attention fo the other, they each complement each other well and I really like that a lot.

Now, for SYMMETRICAL:

MODERN + RUSTICVia Blogger Lena Terlutter

MODERN + RUSTIC

Via Blogger Lena Terlutter

I’m all about the simplicity of this wall and the black and white really does it for me in the sense that, for my eyes, I don’t have to feel like they are all over the place. For my color-loving friends out there, this wouldn’t work for you but I think it’s a great option for people like me who have a hard time deciding what gets to stay in the runnings and what needs to go. In this case, EVERYTHING stays and I like that.

CLASSIC + REFINEDVia Apartment Therapy

CLASSIC + REFINED

Via Apartment Therapy

So, I bet I know what you’re thinking here-that this is not symmetrical. I actually consider this a bit of both and so, in that, the best of both worlds. While the frames are not the same size, the entry of the floating shelves give the illusion that they are. They are all on the same playing field and it kind of tricks the eye into thinking they are the same when they really aren’t. This option is actually one of my most favorites. I love that you can get the feel of both with this option.

CLEAN + SIMPLEVia Chris Loves Juila

CLEAN + SIMPLE

Via Chris Loves Juila

Okay, so I’m fickle. Sue me. But, this one is a fave as well. I love this because it’s not fussy, would take about 10 minutes to hang and it’s personal. Speaking of approachable, you won’t get more approachable if you choose to go this route and quite honestly, this is probably the road I will choose to go down. I just love the idea of blowing up big photos of our kids or fam and putting them up on our walls. She used engineer prints for this project which is pretty inexpensive and didn’t even spend a ton on her frames. Saving money? Sign me up for that any day. Also makes hubby happy so there’s that.

3 WAYS I AM (doing my bestest) MAKING A DECISION ON HANGING MY GALLERY WALL:

  1. Embrace your personal style. In order to do this I guess you need to decide what your personal style is. Spoiler: It doesn’t have to fit into any trendy box. You can even make it up. If you want to call your style “hodgepodge”, then so be it. Let your wall reflect that and roll with it in confidence. If you love it, chances are, everyone else will as well.

  2. Don’t feel the pressure to complete it all at once. I think this is definitely something I need to tell myself over and over again. It’s okay to start with a couple of things you like and build from it. Remember that your home is a story collected over time. A novel. Not Cliff’s Notes, express version of your life. It’s okay to take your time.

  3. Don’t worry about what everyone else is doing. Okay so I understand this one may be a bit confusing since I shared images here and some pretty amazing designers and their way of doing things but that’s just it—we all have our way of doing things. And while I know this sounds eerily close to number one perhaps it bears repeating. I’m definitely talking about design here but I’m pretty sure we could all take this and run full speed ahead into this idea with most other areas of our lives as well. At the end of the day, whether you’re more of a symmetrical girl or like things a little less straight up, just remember to do you. There are lots of areas in your life where considering what someone else would do would be appropriate. This is your home so this isn’t one of those areas. Just have fun with it!

I haven’t come up with a final decision of course but I bet you guys can guess what I’m gonna do. Which of these is YOUR fave? Have you hung pics up for a gallery wall? If so, how in the world did you decide? Would you consider yourself more the symmetrical or the asymmetrical type? Or do you have a way all your own? Do tell.


Until next time, friends,

-K